Showing posts with label holiday. Show all posts

Tuesday, December 21, 2010

Toffee Squares aka 30 Minutes to Heaven

My friend Marina is an INCREDIBLE baker! We met over 10 years ago (HOLY COW!), when we both worked at Scholastic. Back then, she would amaze me with all of the yummy treats she would whip up for family and friends and to this day, she still rocks my world with her sinful sweets. She recently shared this recipe with the world via Facebook and boy am I glad she did. It's the perfect treat for those who are intimidated by baking because it doesn't even require an oven!

Feel like you should still try to make something festive? Lack time/enthusiasm? Both? Do try these then: Sweet, caramelly, crispy, salty, chocolatey. Four ingredients. Fifteen minutes to prep. NO OVEN necessary! The New York Times, to my surprise/amusement, published a version of this recipe last week as well, though theirs is needlessly complicated. But you know I would not do that to you all.

Toffee Squares aka 30 Minutes to Heaven by: Marina Padakis

Yields: 2 lbs of treats

Ingredients:

1 sleeve (48 crackers total), saltines (Krispy Brand is preffered)

2 sticks butter

1 cup sugar

1 (12-oz) bag chocolate chips (preferably, Ghirardelli 60% bittersweet)

*optional: 2 cups chopped nuts (I used toasted hazelnuts), crushed candy canes work too and add a festive touch

Preparation:

1) Melt butter in saucepan over medium heat. Add sugar and whisk in. Let it bubble away without stirring.

2) Arrange saltines side by side in a grid on your cookie sheet. Broken ones can be used too. You do not need to grease/foil the pan.

3) Let butter mixture cook till it turns a caramel color--no longer yellow, but not mahogany--like a Heath bar inside. If it is all separated/curdled looking that is perfectly OK.

4) Remove from heat. Let the bubbles subside, then whisk the mixture till it comes together into a nice shiny brown goo.

5) Pour in a back-and-forth motion over the saltines. Use spatula to spread evenly over the crackers--and take care, that sh*t is hot! Do not worry if it's a mess, the chocolate covers any mistakes etc.

6) Sprinkle the chocolate chips over the whole thing. They will melt in 2-3 mins, then use the spatula to spread evenly. If you want nuts etc…on top, sprinkle on now.

7) Stick in the freezer for 15 minutes till chocolate is set (or longer in the fridge if you are not in a hurry). The whole thing should pop off the pan in one piece. Use a big knife to cut into squarish pieces; they will shatter/crumble in places, but that is part of their charm. You also get to nibble all the yummy little bits as you go.

TIPS:

-Put them in little cellophane bags tied with twine. Perfect for a last minute holiday edible gift!

Note: The caramel in this recipe is SUPER HOT! Use caution when having children help you in the kitchen for this recipe. Have them stand back while you are working with the hot liquidy caramel. There's plenty for them to do that isn't dangerous such as: arranging the saltines on the cookie sheet and breaking up the cooled toffee into pieces.


Wednesday, November 24, 2010

Easy Orange Brown Sugar Cranberry Sauce


Gobble. Gobble. Folks! I've been a maniac these past few weeks but couldn't let my favorite foodie holiday slip away without sharing one of my tried and true recipes with you--Easy Orange Brown Sugar Cranberry Sauce! I just love the combination of orange and cranberry and the addition of brown sugar gives it a warm molasses flavor that can't be beat.

Canned cranberry sauce be damned! Your guests will never look for the stuff again (unless they are my mother!). This recipe can be made up to a month in advance and stored in an airtight container in the fridge (too late for that but good to know for next year). The good news is, it only takes 15 minutes to make and it's so simple, you could make this the morning of Thanksgiving without even breaking a sweat.


Easy Orange Brown Sugar Cranberry Sauce
Makes 3 1/2 cups

Ingredients:

3/4 cup water
3/4 cup dark brown sugar
Juice and zest of one orange
1/2 teaspoon salt
2 (12 ounce packages) fresh cranberries


Preparation:

1. Dump all of the ingredients into a medium sized saucepan, stir. Bring to a boil over high heat. Switch heat to low and simmer for 10-15 minutes, stirring occasionally. Pour sauce into a bowl and cool completely. Place cranberry sauce into airtight containers (I like to use Ball Mason Jars or empty jelly jars that I save) and refrigerate until ready to use. May be prepared and stored in the refrigerator up to one month in advance.


TIP:

Stir in 1/2 teaspoon of freshly grated ginger into the sauce for a little kick!


Tuesday, October 26, 2010

Cinnamon Candy Corn Cookie Pops


candy corn goodness.

all wrapped up and ready for the kiddos.


fancy-schmancy version with pepitas.


one happy buckaroo! this is how I bribed him to take the pic.

In our house, Halloween marks the beginning of the holiday season. This time of year I ramp up and get ready for the chaos that will ensue in the next coming months. Don't get me wrong, I
LOVE it, chaos AND ALL! I'm one of those people. That doesn't mean I still don't feel a little pressured to be super mommy and get it all done. In fact, I fall behind. A lot. Still...I try. That's gotta count for something, no?

This year I have extra guilt because I've spent the last month developing all sorts of Halloween treats for work (like these and these) and left my sons nursery school party snack for the last minute. Luckily I have a few tricks up my sleeve. Yup. That's right! I have Cookie Pops up my sleeve! LOL.

The dough for these cookies is basic, but very tasty (if I do say so myself). It's a yummy sugar cookie dough which lends itself nicely to many different flavorings and spices. In this case, I flavored them using cinnamon and vanilla extract and decorated with candy corn. Feel free to add your favorite extract or spice and top it with any seasonal appropriate sprinkle or candy. How about dipping them in chocolate and rolling them in crushed candy canes for Christmas? I bet that would be good. OK, lemme stop. I even made some of the pops more, "adult" and topped them with pepitas (aka pumpkin seeds). Very fancy!

I made these with my two year old. It's the perfect recipe to get the kids involved (they love inserting the sticks and topping with candies).

**Read on after the recipe for some more fantastic Halloween treats.


Cinnamon Candy Corn Cookie Pops

Makes 18 pops

Ingredients:

1 cup unsalted butter, room temperature
1/4 cup granulated sugar
1/2 cup brown sugar
1 teaspoon vanilla
1 large egg
2 cups all-purpose flour
1/2 cup whole wheat flour
1/2 teaspoon baking soda

1/2 teaspoon cinnamon

1/2 teaspoon salt
18 wooden popsicle sticks
candy corn for topping


Preparation:

1. Preheat oven to 350 degrees. Line two baking sheets with parchment or a Silpat liner.

2. In the bowl of an electric mixer, cream together butter and sugars on low speed. Add in egg and vanilla. In another bowl, combine flour, baking soda, cinnamon and salt. Add flur mixture to butter mixture until dough comes together, about 1 minutes. Roll dough into walnut sized balls place onto prepared baking sheets, about 2 inches apart (cookies won't spread much).

3. Top each ball of dough with one candy corn and press slightly to flatten. Gently insert popsicle sticks into each ball. Bake for 8-10 minutes. Allow cookies to cool on baking sheets before removing with a thin spatula.


Note: As you can see, I used some whole wheat flour in this recipe but I assure you, I wasn't trying to make these healthy. Truth be told, I ran out of white flour so I gave these a try with a small amount of wheat flour. Luckily, they tasted great! Feel free to use all white flour in this recipe, just don't use more than 1/2 cup of wheat flour for these. The texture will not be the same.


More fun Halloween Recipes:


Monday, October 25, 2010

Apple Cider Granita


Every September we go apple and pumpkin picking in Bucks County, PA. It’s become a family tradition that I look forward to every year. I plan our trip 3 months in advance, that's how much I love it.


This year was even more fun because my son is two, which is definitely the age of exploration. He had a blast last year, but there is something about the way he sees things as a two year old that is very special and exciting. He can communicate verbally in a bigger way this year, and he can also run, jump and explore like a big boy now. It's really a site to behold.


Each year we look forward to enjoying a special frozen treat at the apple orchards-Cider Ice! It’s a super-delicious frosty treat made of frozen Cider. Genius! It may seem strange to sell a frozen treat during the fall, but it was 80 degrees when we went picking this year so, Cider Ice was a perfectly refreshing snack. After we ran around the orchards and picked ‘till our hearts content, my son, sat quietly, on a pumpkin and gleefully slurped down this delicious delight.


My son is a fan of all things frozen, so I knew I had to try and recreate a similar snack at home. I wanted to keep this recipe pure and healthy, using only cider and since I don't own a slushy machine or a Snoopy Snow Cone machine, the first thing that came to mind is Granita (I AM Italian after all!). It's barely a recipe, it's that simple to make. Only 1 ingredient! It's perfect for kids but elegant enough to entertain with (think-refreshingly light Thanksgiving dessert), topped with some fresh cinnamon whipped cream and served in a pretty glass.


This recipe is the perfect use for any cider you might have lying around the house. I give it to my son as an afternoon snack or as a dessert in lieu of ice cream.


Apple Cider Granita

Serves 4-6

Ingredient: (yes. just one!)

3-4 cups apple cider


Preparation:

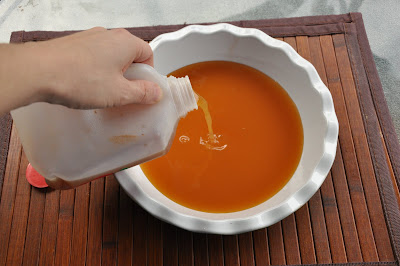
1.Pour cider into a 9-inch glass deep-dish pie plate or any other freezer friendly, shallow container.

2. Place dish into freezer for 2 hours. Remove plate from the freezer and scrape the
frozen cider with a fork (see images above). The idea is to shave the ice away with your fork, creating a snowy texture. Place the plate back into the freezer and continue to freeze for another hour. Repeat the scraping process until all of the frozen cider is scraped away, about 4 hours total. Scoop out the frozen cider and place into serving cups. Serve au naturale or topped with some cinnamon spiked fresh whipped cream.

Friday, October 15, 2010

Not Just Chocolate Chip Cookies + Tips to help you get your holiday baking started early!


The other day I got an email from my Aunt telling me about these amazing cookies someone made her. When you like to cook and bake, you tend to get a lot of people sending you recipes to try out. Normally, I would just add the recipe to my ever-growing stack of "recipes to try when I have free time" list (HA!), but when she told me that these cookies contained pretzels AND potato chips, I was sold. I love dessert and I don't need an excuse to try out a new cookie recipe but this sweet and salty combo definitely peaked my interest. I'm six months pregnant and my kicks definitely come from sweets these days. Since I can't have the Margarita I've been craving, this cookie would have to do. The recipe was really good as written. However, I was craving a slightly different texture, something chewy to contrast with the crispness of the mix-ins. Never being one to leave well enough alone, I decided to try and make them my own. I am super happy with how these came out and I hope you are too.


This recipe is the prefect excuse to use up all of the broken chips and pretzels that inevitably invade the bottoms of the bags after your kids decide to "help" you unpack the groceries. These babies may not be the healthiest cookie in the world, but I like my desserts decadent and a little (ok, A LOT) naughty. You have my permission to go hog-wild. And if you feel that guilty, go ahead and sprinkle in some wheat germ, I wont tell! : )


P.S. My friend OneHungryMama posted something similar to these last week (great minds!). We all must have party snacks on the brain! She kicked them up a notch by adding peanuts. Brilliant!


Not Just Chocolate Chip Cookies

Makes 12-15 large cookies


3/4 cup granulated sugar

1/2 cup unsalted butter, room temperature

1 large egg

1 teaspoon vanilla extract

1 1/4 cups all-purpose flour

1/2 teaspoon baking soda

1/2 cup semi-sweet chocolate chips

3/4 cup crushed, pretzels

1/2 cup crushed, salted potato chips


1. Preheat oven to 350 degrees. Line 2 baking sheets with Silpat or parchment paper.


2. In the bowl of an electric mixer beat butter and sugar until creamy. Beat in egg and vanilla extract until incorporated. In a separate bowl, combine flour and baking soda. Add dry ingredients to the wet ingredients and beat on slow just until flour is incorporated. Turn the mixer off and remove the bowl. Stir in chocolate chips, pretzels and potato chips by hand.


3. Drop heaping tablespoons of dough onto prepared cookie sheet, spacing them 2 inches apart. Bake for 12-15 minutes or until the edges begin to turn golden brown. Place on a rack to cool. Enjoy!


To Freeze Drop Cookie Dough:

I love making batches of cookie dough and freezing them. I feel like a great mom/host when I can bake off a fresh batch of warm cookies at a moments notice. The method is super simple and a great one to know, especially during the holiday gift-giving/cooking/baking frenzy we all put ourselves through. I plan on starting my holiday baking early this year and this is how I'll get it done.

Method:

Make your favorite drop cookie recipe. Clear enough space in your freezer to fit your baking sheet. Divide dough into balls and arrange on a cookie sheet lined with parchment or wax paper. Place the cookie sheet in the freezer. When the dough balls are frozen, place them in a Ziplock freezer bag or small air-tight container, label and date them. Dough will last 3 months in your freezer.

To Bake Frozen balls:

You can defrost your cookie dough balls on a parchment or Silpat lined baking sheet in the refrigerator, this will take at least an hour.

OR

If you are impatient like me, you can bake them off frozen. Place frozen dough balls directly on a parchment or Silpat lined baking sheet and bake according to your recipes specifications. Usually your time will be a little longer than what your original recipe calls for. Keep checking the cookies for doneness.


Wednesday, December 23, 2009

Perfect Chocolate Chip Cookies


(Note: Dark Chocolate cookies are made from a recipe on the back of the Nestles Peanut butter Morsels bag-YUM!)


My son Griffin James


I know I haven't posted in a while. I deeply apologize for that but it's just further proof that I am far from super-mom. I'm a full-time working mama going through the same struggles as every other parent while desperately trying to give my son the happiest life possible. Sadly, that doesn't leave a heck of a lotta time for blogging but I couldn't leave ya hanging during the holidays. To show you just how much I love y'all (said with my very Brooklyn NY accent), I am giving you my TOP SECRET, took 6 years to develop, Perfect (in my eyes) Chocolate Chip Cookie Recipe. Don't say I never gave ya anything, kay?

In my book, holidays and tradition go hand in hand. And like most people, tradition becomes even more important after you have children. Bridging traditions from our own childhood with the new ones we create with our own children is part of the fun! This past year I have been driving myself batty trying to make every occasion as special and as memorable as possible for my son. And get this, he is only 16 months old!!!! Exactly what portion of the past 16 months do I think he will actually remember? LOL. It doesn't matter because this past year has been a way for me to try new things. Plus, what he doesn't remember he will be able to see in the 6 million pictures my husband says I take-HA! It's been a blast starting our own Salerno family traditions like leaving cookies out for Santa. I never did that as a child, but me being the dessert-crazed nut that I am, it's just one more excuse to bake (and eat) more cookies!

Happy Holidays from our family to yours!


P.S. For all of you who missed my Cookie Swap this year due to the weather or whatever else ya had going on, this is what you missed!!!!


Perfect Chocolate Chip Cookies

Yields approx 17 LARGE cookies

2 1/4 cup all-purpose flour
1/2 teaspoon baking soda
1 teaspoon fine salt
1 1/2 sticks unsalted butter, melted and cooled slightly
1 1/4 cup light brown sugar
1 1/4 cup granulated white sugar
1 tablespoon vanilla extract

1/2 teaspoon almond extract

1 large egg

1 large egg yolk
1 bag chocolate chips


1)- In a large bowl, whisk together flour, baking soda and salt. Set aside.

2)-Stir together melted butter, brown sugar, sugar, vanilla and almond extract. Add egg, then the yolk. Beat well. Stir in dry ingredients, then fold in chocolate chips until incorporated. Cover with plastic wrap and chill dough until firm. At least 30 minutes.

3)-Preheat the oven to 350 degrees.

4)-Drop 1/4 cup sized mounds of dough onto a silpat or parchment baking sheet.

5)-Bake in preheated oven for approximately 10-12 minutes or only until the edges begin to turn golden. (They will seem underdone but they aren't) Cool on the sheet for a couple of minutes and remove with a spatula to a cooling rack. Cool thoroughly and enjoy!


SAVE TIME! Make the dough ahead of time and freeze it.


FREEZING INSTRUCTIONS: Simply drop as many cookies as you can onto a parchment or silpat lined cookie sheet. Place entire cookie sheet in the freezer for a couple of hours or overnight. Cookie dough should be as hard as rocks. Remove dough from cookie sheet and place into ziplock freezer bags or any airtight container.

TO BAKE AFTER FROZEN: Preheat your oven according to your particular recipe. Place frozen cookie dough balls onto a parchment or silpat line baking sheet and allow to thaw for 15-20 minutes. Bake according to your recipe. If you are impatient like me, you can also place the frozen cookie balls straight into the oven but your cookies will take longer to bake and you run the risk of having burnt outsides and mushy middles if you aren't careful.

BLOG SHOUT-OUT: Mama minds think alike. Check out my girl Stacie's FAB cookie recipes at Chowmama.


Friday, October 2, 2009

Sweet Potato Spider Webs


OK, I admit it. I am a Halloween freak. I couldn't wait to be a mother so I would have an excuse to be even more over the top with costumes and decorations than I already am. It's insane really. Each year we decorate our house with black silhouettes of crows and rats and spiders and I have to say, I still have some up from two years ago. I was goth in High School and well, I guess I never really grew out of my love for all things macabre. I start thinking about Halloween in August and usually purchase our costumes then too.
So of course, my obsession with Halloween and Halloween-themed things doesn't stop at food.

My recipe for Sweet Potato Spider Webs came about when I was looking for a Halloween-themed snack that was delicious and easy to make. I made these for my son last week and he LOVED them!!! They can be baked or fried and are great as snack because they combine protein with a healthy starch. I make a bunch and keep 'em in the fridge for up to 2 days. They are a godsend when I am running late with dinner and I have one hungry little boy banging on his highchair tray. Make these for yourself or for your little Ghouls and Goblins this Halloween, I bet you they'll ask for more.


P.S. If I had it my way all of our dinnerware would look like the plate above and we would eat every meal would be served on that obnoxiously loud tablecloth!!


Sweet Potato Spider Webs
Makes about 12 spider webs

2 cups shredded sweet potatoes (about 2 medium sized potatoes)
2 large eggs, beaten
1 tsp salt
1/2 tsp black pepper
1/4c olive oil or canola oil

*optional-2 tbsp parsley


1. Combined sweet potatoes, egg, salt and pepper in a large bowl and stir to combine.

2. Heat olive oil in a large non-stick skillet over medium-high heat.

3. Working in batches of 6, spoon 1 heaping tablespoon of potato mixture per spider web into skillet, spreading into 1 1/2-inch rounds with the back of your spoon. Reduce heat to medium-low and cook until undersides are browned, about 2 minutes. Turn spider webs over and cook until undersides are browned, about 1 minute more.

4. Transfer to paper towels to drain. Add more oil to skillet as needed and repeat with remaining potato mixture.

5. Keep warm on a wire rack set over a cookie sheet in the oven.


SWAP OUT

-Use 2 cups of shredded zucchini or carrots in place of the potato.
-Skip the salt and pepper, toss in some cinnamon and top with sour cream or even applesauce.


BAKED METHOD

1. Line a rimmed cookie sheet with aluminum foil.

2. Spray the foil heavily with oil.

3. Preheat your oven to 375 degrees.

4. Spoon 1 heaping tablespoon of potato mixture per spider web into the foil spreading into 1 1/2-inch rounds with the back of your spoon.

5. Bake in the oven for about 8 minutes and then turn over using a thin metal spatula. Cook for another minute and remove from oven.


STORAGE

Wrap in foil or place in Tupperware and refrigerate for up to 2 days. Reheat for 8-10 seconds in the microwave or in a non-stick pan over low heat. for 10 seconds on each side.

Monday, April 6, 2009

Two Ways with Eggs and Easter Fun!


Easter Anecdote


Ok, I confess. I took Griffin to see the Easter Bunny, TWICE! Yes, I am nuts and YES my husband wanted to kill me but I am a sucker and this is Baby’s First. Why did I go twice you ask? Well, because the first picture wasn’t so hot. I schlepped all the way out to Long Island for the perfect bunny, in a nice clean mall, only to come out with 40 dollars worth of pics where my kid looked like a flea on the lap of Peter Cottontail. I was pissed! So, one of my first orders of business (I’m not kidding) after we returned from our trip to Italy was to march to our local dingy mall in Brooklyn and get a new bunny pic. Sure I am grossed out by the idea of placing my baby on the lap of a strange costumed character. Especially when that costume has probably been pooped-on, peed-on and barfed-on all at the same time and never washed. And yes, the idea of standing in line behind dozens of screaming kids and angry parents in a sweltering mall isn’t the most appealing idea. But that didn’t stop me from going twice. A mama does what shes gotta do for the kiddos. Ok, Ok I admit it, this was actually for me because Griffin is only 7 months and won't remember a thing. For some strange reason I am sentimental and silly now that I am a mommy, sue me! All of my efforts were not in vane, Griffin cooperated, Mommy was happy and Daddy managed to deal. Crisis averted and I got my friggin’ picture! Hallelujah!

The above story is entirely true and posted to make you laugh and also to let you know you are not alone if you too are a nut like me. Please, share your stories (if you have any like this one) in the Comments Section below. I mean, who knew that the girl who was a goth rocker with pink hair in High School would go from chasing The Sisters of Mercy to obsessing over a large fuzzy fictitious rodent. The again, both the band members and the bunny are grown men in costume and make-up. So really, what's changed? I love my new life!


Easter Crafts

If you are looking for some fun Easter crafts that are made out of recycled plastic bottles, check out the make your own milk jug or soda bottle Easter Basket crafts on Sheknows.com. If you are like me and don't tend to buy milk in plastic jugs, feel free to apply the same strategy using a regular paper carton of milk. A square Easter basket is just as fun as a round one!


Easter Eats

Easter is coming so of course I have eggs on the brain. Eggs are super nutritious and a very inexpensive way to get some protein into your diet. In our house we eat eggs for breakfast, lunch or dinner. My husband and I grew up eating Eggs in a nest. It's a fun way to get the kids excited about breakfast and they can help cut out the holes for the egg. Eggs in ham cups looks fancy but it's a cinch to prepare. It's a great recipe for when you are hosting a breakfast or brunch and need a large number of eggs to be ready at the same time.

For the nutritional profile of eggs and some info on why they are so good for you, go here.


Eggs in a nest


Eggs in a nest
Serves 2

2 tbsps butter
2 slices of bread, cut into 1/2 inch slices (any kind will do but I like a sturdy rustic country loaf)
2 large eggs


Using a shot glass , small round cookie cutter or even a knife, cut a 1 1/2-inch circle in the center of each piece of bread.

Preheat a large non-tick frying pan over medium heat.

Place butter in the pan and allow to melt. Drop slices of bread into the pan and toast one side of the bread (abut 30 seconds). once the first side of the bread is golden brown, flip the bread over.

Adjust the heat of the pan to low and crack each egg into the hole in each piece of bread.

Cover the pan and cook the egg until it's reached our preferred level of doneness. (For little ones you might want to cook it all the way through but for me, I like it slightly runny in the middle).

Serve immediately.


Eggs in ham cups with buttered toast dipping sticks


Eggs in ham cups with buttered toast dipping sticks
Serves 4

Cooking Spray
4 pieces of deli ham, sliced thin but not paper thin
4 eggs
2 pieces of bread, toasted
1-2 tbsps butter

Preheat your oven to 375 degrees.

Spray a non-stick muffin pan with cooking spray.

Line 4 of the muffin cups with ham so that they look like little cups.

Crack an egg into each of the ham lined muffin cups.

Cook until the eggs have reached your desired level of doneness. For almost fully cooked through eggs, cook for 25-30 minutes.

Butter your toasted bread. Cut toasted bread into sticks.

Use the toast sticks to dip into eggs.

Enjoy!

Sunday, March 15, 2009

Just add Corned beef and Cabbage.


Everyone is Irish on Patrick's Day right? And what's better than some homemade Irish Soda Bread? Irish Soda Bread with Cinnamon Honey Compound Butter.


Irish Soda Bread with Cinnamon Honey Butter
Yields 1 loaf

Nonstick vegetable spray
2 c all purpose flour
4 tablespoons sugar
1 1/2 teaspoons, baking powder
1 teaspoon, salt
3/4 teaspoons, baking soda
3 tablespoons cold butter, cut into small cubes
1 c buttermilk
2/3 c raisins
1 tablespoon whole milk, for brushing


Preheat the oven to 375 degrees. Spray non-stick sheet pan with cooking spray. In a medium bowl, whisk the sugar, baking powder, salt and baking soda. Add in the cubes of butter using your fingertips to rub into the dough. Break the butter up until the flour begins to resemble a coarse mealy texture. Slowly stir in the buttermilk. Mix the dough until just combined, and then add in the raisins. Do not over mix.

Flour your hands and shape the dough into a large ball. Transfer to prepared baking sheet and flatten slightly. Use a sharp knife, cut a large cross into the dough (about 1/4 inch into the surface of the dough). Brush with some milk and sprinkle with about 1 tsp of coarse sugar (this is optional).


Bake for approximately 40 minutes. Cool bread in pan for about 10 minutes. Transfer to a wire cooling rack. Bread can be served warm or at room temperature. Serve with Cinnamon Honey Compound Butter, see recipe below).


Cinnamon Honey Compound Butter

1 stick of salted butter, softened to room temp
1 1/2 tablespoons of honey
1/2 teaspoon cinnamon

Leave the butter on your counter until it comes to room temperature. In a small bowl stir the butter with a fork until it is light and fluffy. Add in the honey and cinnamon and mix until well combined. Keep the butter at room temperature if you plan on using it right away. Otherwise, place butter on a piece of wax paper and shape into a log. Roll and wrap the wax paper around the butter and place in the refrigerator for about 2 hours or until set.

The butter will keep in the refrigerator for about 2 weeks, tightly covered.


TIP:
Don't have buttermilk? No worries, you can make your own. Warm 1 c of milk in a small saucepan and add either 1 1/4 tablespoons of white vinegar OR 1 3/4 tablespoons of Cream of Tartar. Stir the milk with a whisk and alow to sit for 5 minutes. Use in place of store bought buttermilk.


TIP:
Use the compound butter on pancakes, muffins or French toast.